Pressure Washer Loses Pressure — Pump & Unloader Diagnosis
⚡ Quick Answer
Pressure loss is typically caused by a mismatch in water supply flow (GPM), a partially clogged or worn-out nozzle tip, or a malfunctioning unloader valve that is bypassing water prematurely. Check your inlet screen for debris and ensure your garden hose provides at least 1 GPM more than the pump's rating to prevent cavitation. If the engine runs fine but pressure is low, focus entirely on the pump's internal check valves and the unloader settings.
What do you want to do?
Most Likely Cause
Failed Unloader Valve
The internal spring or O-rings have degraded, causing the valve to leak internally. Inspect the valve body for external moisture or perform a pressure test with a gauge to confirm bypass failure.
Start here — this is the most common reason for this symptom.
Why This Problem Happens
A pressure washer maintains high pressure by forcing a fixed volume of water through a restricted orifice (the nozzle) using a positive displacement pump. When pressure drops, it almost always signifies that the system is unable to maintain that restriction or the pump is bypassing internally. The most common culprit is a failed unloader valve, which is designed to recirculate water when the trigger is released; if the spring fatigues or the O-rings inside the valve body degrade, water bypasses internally even when the trigger is pulled, preventing the pump from building working pressure. Alternatively, cavitation caused by a restricted water supply causes air bubbles to implode inside the pump head, pitting the brass or stainless steel components. This loss of hydraulic seal integrity means the pump cannot push water against the resistance of the nozzle, leading to a weak, pulsating spray that lacks the kinetic energy required for cleaning. These mechanical failures create a feedback loop where the lack of pressure leads to higher heat generation within the pump head, further accelerating seal breakdown.
Common Symptoms
- Pulsating spray pattern at the nozzle
- Engine speed remains high but output force is weak
- Water leaking from the unloader valve body
- Visible drop in pressure when switching to a smaller nozzle orifice
- Pump head becoming abnormally hot to the touch during operation
Before You Buy Parts
Quick, free inspections — check these first. Most repairs don't actually need replacement parts.
Complete Resource Guide
Ultimate Pressure Washer Troubleshooting & Repair Guide
Repair Overview
1–2 hours
$20–$100
First Checks — Start Here
- 1Verify water supply delivers at least 5-6 GPM (bucket test)
- 2Clean the nozzle orifice with a wire tool or paperclip
- 3Inspect and clean the water inlet mesh filter screen
- 4Bleed all air from the pump with the engine off before starting
- 5Check high-pressure hose for internal collapses or kinks
- 6Inspect the unloader valve for a stuck piston or broken spring
Safety Warnings
- !Ensure the water supply is completely turned off and the system is depressurized before disconnecting hoses.
- !Never point the spray wand at yourself or others, even if the pressure seems low.
- !Do not exceed the manufacturer's maximum PSI rating, as this can cause catastrophic pump failure or hose rupture.
- !Be careful when loosening the hex plugs as there may be trapped air or water under pressure.
- !Drain the pump oil into an approved container before attempting to split the pump head to avoid environmental contamination.
- !Use only a gauge rated for your specific pressure washer's max PSI to prevent the gauge from exploding.
Always disconnect the spark plug, work in a well-ventilated area, and consult a professional if unsure.
Most Likely Causes
Ranked by likelihood — tap each to see diagnosis details.
The internal spring or O-rings have degraded, causing the valve to leak internally. Inspect the valve body for external moisture or perform a pressure test with a gauge to confirm bypass failure.
These small spring-loaded valves control the directional flow of water. Debris or mineral buildup prevents them from seating properly, allowing water to flow backward instead of toward the nozzle.
🔧 Step-by-Step Fix Guide
Inspect and Clean Inlet Filter
Remove the garden hose and inspect the mesh screen inside the pump inlet. Use a pair of needle-nose pliers to pull out the screen and clear any sediment or mineral deposits.
Ensure the water supply is completely turned off and the system is depressurized before disconnecting hoses.
Verify Nozzle Integrity
Check the spray tip for debris using a nozzle cleaner tool. If the tip is visibly worn or the hole appears misshapen, replace it with a new tip matching the specific GPM and PSI rating of your machine.
Never point the spray wand at yourself or others, even if the pressure seems low.
Perform an Unloader Valve Adjustment
Locate the adjustment knob on the unloader valve and turn it clockwise to increase spring tension. If pressure does not increase, the internal O-rings are likely compromised and the valve requires a rebuild kit.
Do not exceed the manufacturer's maximum PSI rating, as this can cause catastrophic pump failure or hose rupture.
Check Pump Check Valves
Remove the hex head plugs on the top of the pump head using a socket wrench. Inspect the plastic or stainless steel check valves for cracks or stuck debris, then clean or replace them as a set.
Be careful when loosening the hex plugs as there may be trapped air or water under pressure.
Inspect High-Pressure Seals
Disassemble the pump head to inspect the brass and rubber high-pressure seals for scoring or tears. If the pump oil appears milky, the seals are failing and allowing water into the crankcase.
Drain the pump oil into an approved container before attempting to split the pump head to avoid environmental contamination.
Test with a Pressure Gauge
Install a liquid-filled pressure gauge between the hose and the pump outlet. Run the machine and compare the reading to the factory specification to verify if the issue is truly the pump or a faulty wand/nozzle assembly.
Use only a gauge rated for your specific pressure washer's max PSI to prevent the gauge from exploding.
What To Test Next
If the basics check out, verify spark, fuel delivery, and compression in that order — the three essentials of any combustion engine.
Component Reference

Carburetor & Fuel Intake
The carburetor mixes air and fuel for combustion. A clogged jet or stuck float is the #1 cause of small engine starting and surging problems.

Spark Plug & Ignition System
The spark plug ignites the air-fuel mixture. A fouled plug, wrong gap, or failing ignition coil will prevent the engine from firing.

Oil & Lubrication System
Regular oil changes are critical. Low or dirty oil causes engine wear, overheating, and eventual seizure. Check the dipstick before every season.

Air Filter & Intake
A clogged air filter starves the engine of air, causing rich running, power loss, and hard starting. Inspect and clean or replace it each season.
Photos for educational reference. Actual parts may vary by make and model.
Common Mistakes to Avoid
Tightening the unloader valve too far, causing the engine to stall
Running the pump without water, which instantly scorches the internal seals
Using thread sealant tape on the garden hose inlet, which can break off and clog valves
Replacing individual check valves rather than the entire set
Ignoring the pump oil, leading to catastrophic bearing failure
If This Didn't Fix It
Still having trouble? These are the next things to check:
Get the Exact Parts for Your Machine
Tell us your equipment's year, make, and model — we'll search for parts that actually fit, not generic ones.
Finding parts for
pressure washer loses pressure
Required Gear
Matched to your pressure washer loses pressure — click to find the exact fit on Amazon.
Unloader Valve Replacement Kit
If adjustment does not restore pressure, the internal spring or plunger has likely failed, requiring a complete assembly swap to regulate water flow correctly.
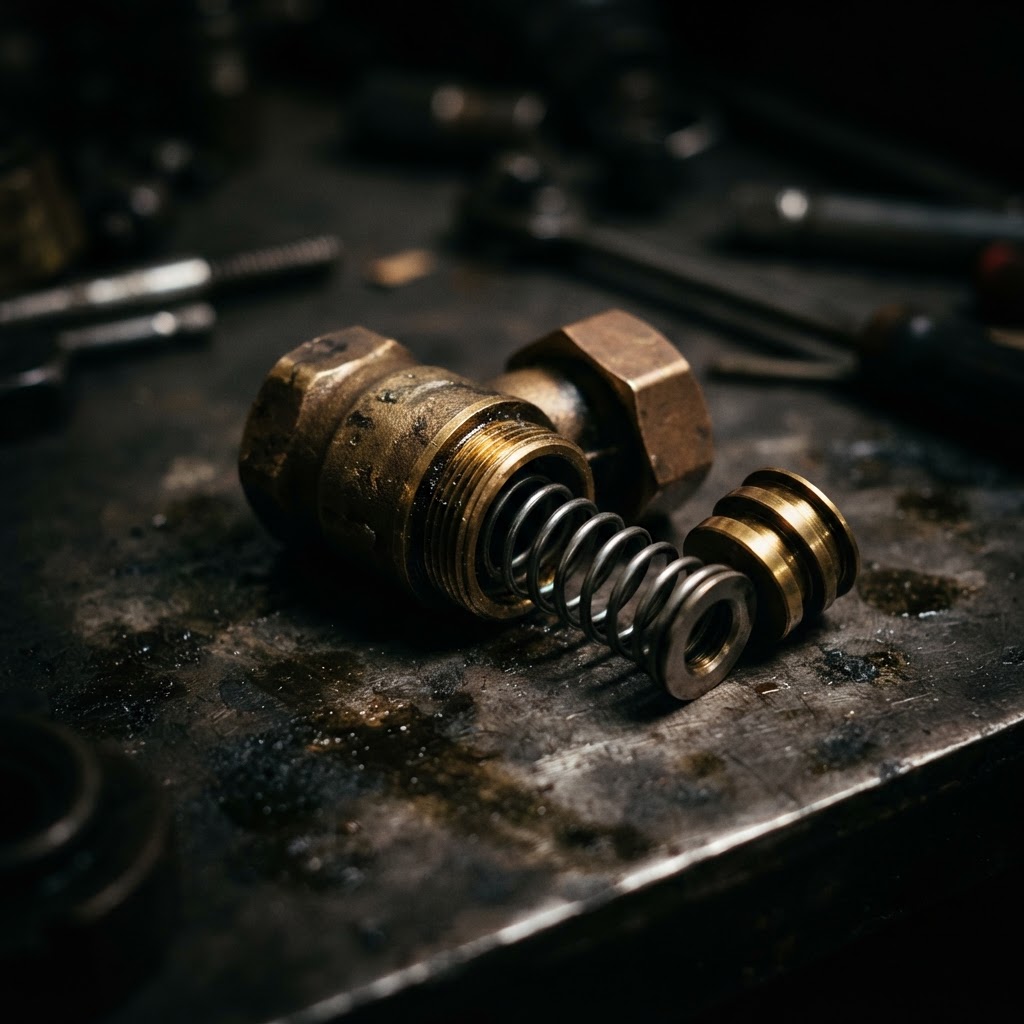
Pump Check Valve Set
Worn or debris-damaged check valves prevent the pump from holding pressure, necessitating a replacement of the entire valve cartridge set to restore internal suction and discharge efficiency.
High-Pressure Plunger Seal Kit
If the pump is leaking water internally or suffering from cavitation-induced wear, these seals are essential to prevent pressure loss and ensure the plunger maintains a proper seal against the cylinder wall.
Replacement Spray Nozzle
Pressure loss is often caused by an eroded or oversized nozzle orifice; replacing the nozzle is the most common fix for restoring the pressure drop required for the unloader valve to function correctly.
Pump Inlet Water Filter
Installing a new inlet filter is critical to prevent abrasive particles from damaging new check valves and seals, effectively stopping the cavitation that caused the initial pressure loss.
Affiliate Disclosure: Lil Engine may earn commissions from qualifying purchases.
Pro Tips from the Community
Real-world fixes from Reddit, YouTube & forums.
"If your pressure drops when you pull the trigger but is high for a split second, it's almost always a water supply volume issue—your hose can't keep the pump 'fed'."
Reddit r/pressurewashing"Don't trust the 'pressure' setting on the pump until you've checked the nozzle. A worn $5 nozzle makes a $500 pump look broken."
YouTube comments"Internal check valves can get 'stuck' if the unit sits over winter with water inside. A light tap on the valve caps with a plastic mallet can sometimes jar them loose."
TractorByNet ForumPrevent This From Coming Back
Flush the system with a pump saver or antifreeze solution before winter storage
Check and replace the garden hose inlet screen every season
Change the pump oil every 50-100 hours of operation
Never pull the trigger while the engine is cold-starting to prevent air locks
Use a high-quality water filter if drawing from a well or pond
Prevent This From Happening Again
While you're fixing it, stock up on the maintenance essentials that keep your pressure washers running right.
Pressure Washer Pump Oil
Pump oil degrades — change annually to prevent pump failure.
Get on AmazonPressure Washer Nozzle Set
Worn nozzles lose pressure — a fresh set restores cleaning power.
Get on AmazonFuel Stabilizer
Prevents carb gumming during seasonal storage.
Get on AmazonAffiliate Disclosure: Lil Engine may earn commissions from qualifying purchases.
Frequently Asked Questions
Pulsing usually indicates air in the lines or a failed check valve. Ensure all connections are tight and that you have bled the air out of the system by running it without the nozzle for 30 seconds.
Video Help
Helpful videos showing these repairs in action.
Share Your Repair
Real-world fixes help everyone. Share what worked and your repair becomes part of Lil Engine's community database.
Related Problems
More Pressure Washers GuidesRelated Maintenance Articles
Related Searches
Pressure Washers Troubleshooting
Did this help?
Your feedback helps improve guides for everyone.